Just some details about my latest bread-baking session last week…
Step 1: Making Dough
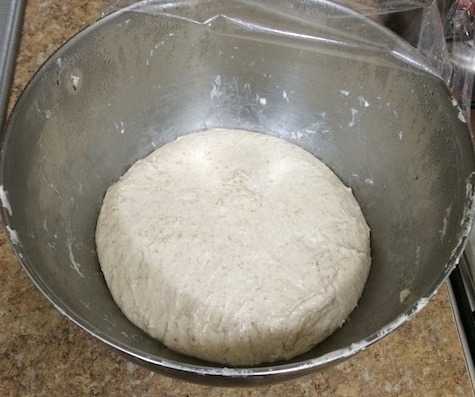
I began with a starter fed with rye flour and water. Once it doubled in volume, I whipped up a batch of dough with the following amounts:
- 387g total starter
- 306g Trader Joe’s white All Purpose flour
- 156 room temp tap water
- 12g salt
I let the mixture sit 20 minutes before adding that salt, then I kneaded it all until I was convinced the salt was evenly distributed. It’s a wet mix, so kneading is done more by lifting and folding than by pushing.
I then put the dough into my mixing bowl and covered it with plastic wrap. That sat in the fridge overnight, actually about three days.
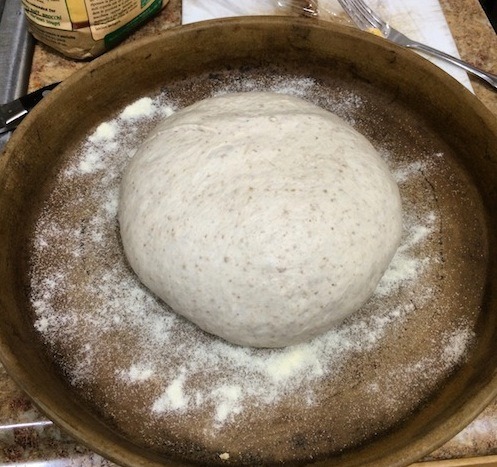
Step 2: Shaping and Proofing
The shaping process is hard to describe in text, but it basically involves folding the dough together and tightening its form so it will capture more gas during the proofing stage. I let the shaped dough sit in the base of my cloche (sprinkled with semolina to avoid sticking and give texture) until it reached room temperature and filled with some gas. On this particular day, I turned my oven on for a minute and then switched it off so the dough (in the cloche) could sit in the warmth for a bit to speed up the process.
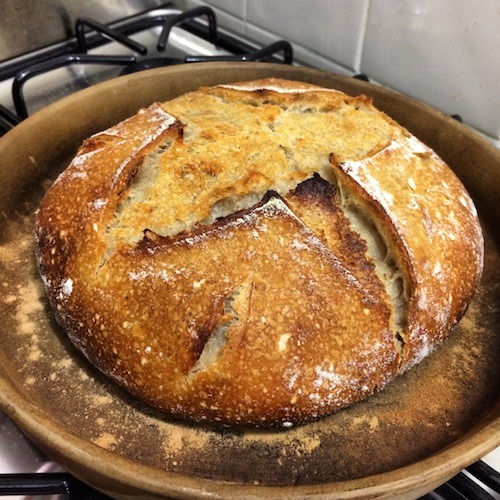
Step 3: The Bake
Once the dough had rose sufficiently (ie I was running out of time) I sprinked some flour on it and scored a pattern so it would A) rise and open, and B) look cool. It worked! Bake temp was 450 F but I let the oven preheat for about 35 min at 550 F with a Baking Steel in there. Since I didn’t preheat my cloche, I figured I’d use the steel’s fast conduction to throw heat into the clay and give the dough some nice spring. The bread baked in the cloche for about 30-35 min before I removed the lid for the final 7-10 min. That last bit gets the top nice and golden brown!
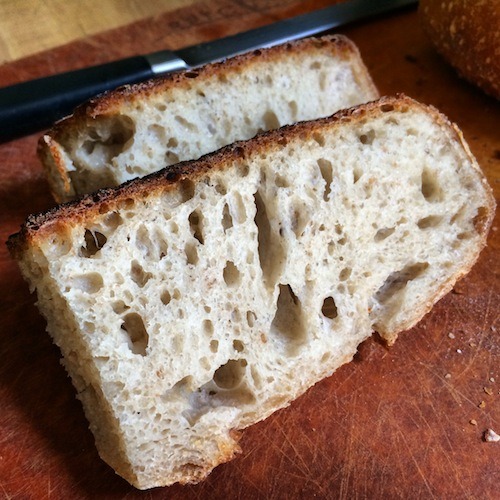
Step 4: The Crumb Shot
You gotto wait at least 30 minutes (it’s fun to listen to the little crackling sounds) but then you get to cut in and find out whether or not you’ve made anything worth eating. Sometimes the outside looks great but the inside is dense and undercooked. This loaf came out awesome and the crumb is clear about that! Funky, uneven holes but dense enough to spread some butter or jam.